
[ad_1]
If you’re not using two-factor authentication to secure your Apple ID and iCloud account, you really should. In the past, hackers have claimed that millions of stolen iCloud credentials required Apple to pay a ransom. So while Apple does its best to protect your data, events like this, while unlikely, can happen. And with all the valuable information on your iPhone these days, you want to make sure no one can dump it.
But you know what? Using two-factor authentication should completely protect you. It’s easy to set up, so take a moment and do it now.
Moreover, some Apple services and features demand you enable 2FA for your account as an additional security measure.
You used to be able to set up two-factor on your account settings page at appleid.apple.com, but now you have to do it on your Mac or iOS device. (Apple ID users who don’t have a compatible device can still use the old two-step verification system – see below for more details.)
iPhone and iPad
Follow these steps on your iPad, iPhone, or iPod touch. These steps are for iOS 14.5 or later and should be the same for iPadOS. The device must be password protected (Settings > Touch ID/Face ID and password).
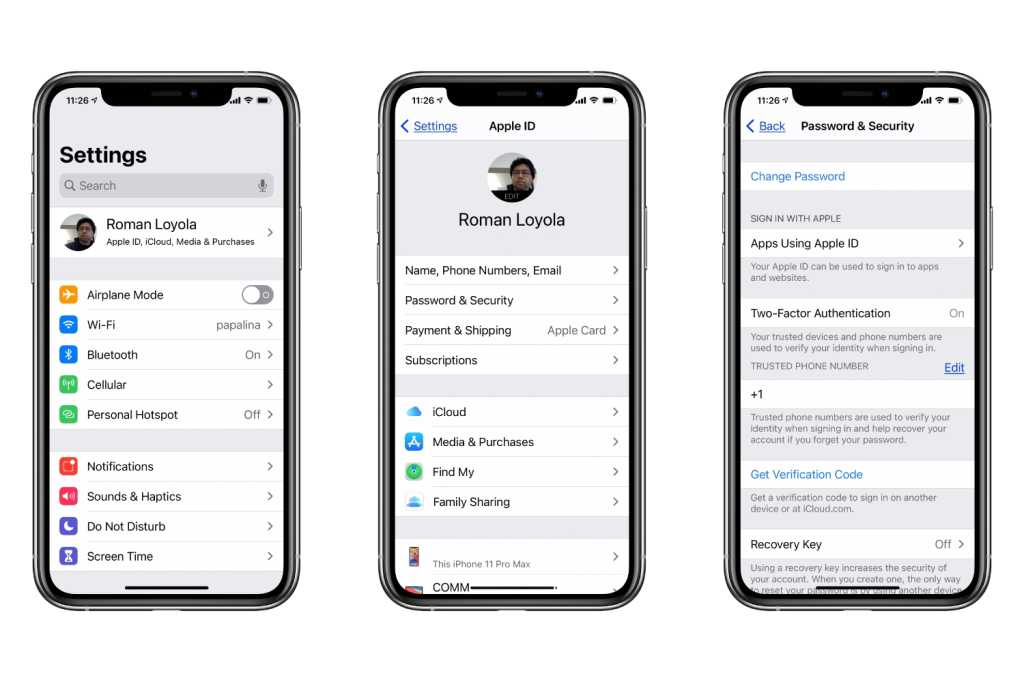
After you set up two-factor authentication on your iPhone or iPad, you’ll see a pop-up code when you try to sign in to iCloud anywhere else. If you don’t see a popup or don’t receive a text message, you can return to Settings > Apple ID > password and safety and press Get verification code.
IDG
- Launch the Settings app.
- Tap your Apple ID profile at the top. Obviously, you need to be signed in with the account you want to secure with two-factor authentication.
- Tap password and safety.
- find Two-factor authentication setting and turn it on.
- Next, enter a phone number where you can receive a text message or phone call with a two-factor code. You can also specify if you want a text or a call.
- You will receive this text message or call and enter the six-digit verification code on the next screen.
That’s all! Two-factor mode is enabled and this is your official trusted device. The next time you sign into iCloud.com or set up your iCloud account on a new device, you’ll have to enter your username and password first, and then you’ll be prompted for a code. This code will appear in a pop-up window on your trusted devices, in a text message or by calling the number you provided, or you can return to this screen and click “Get Verification Code”.
Poppy
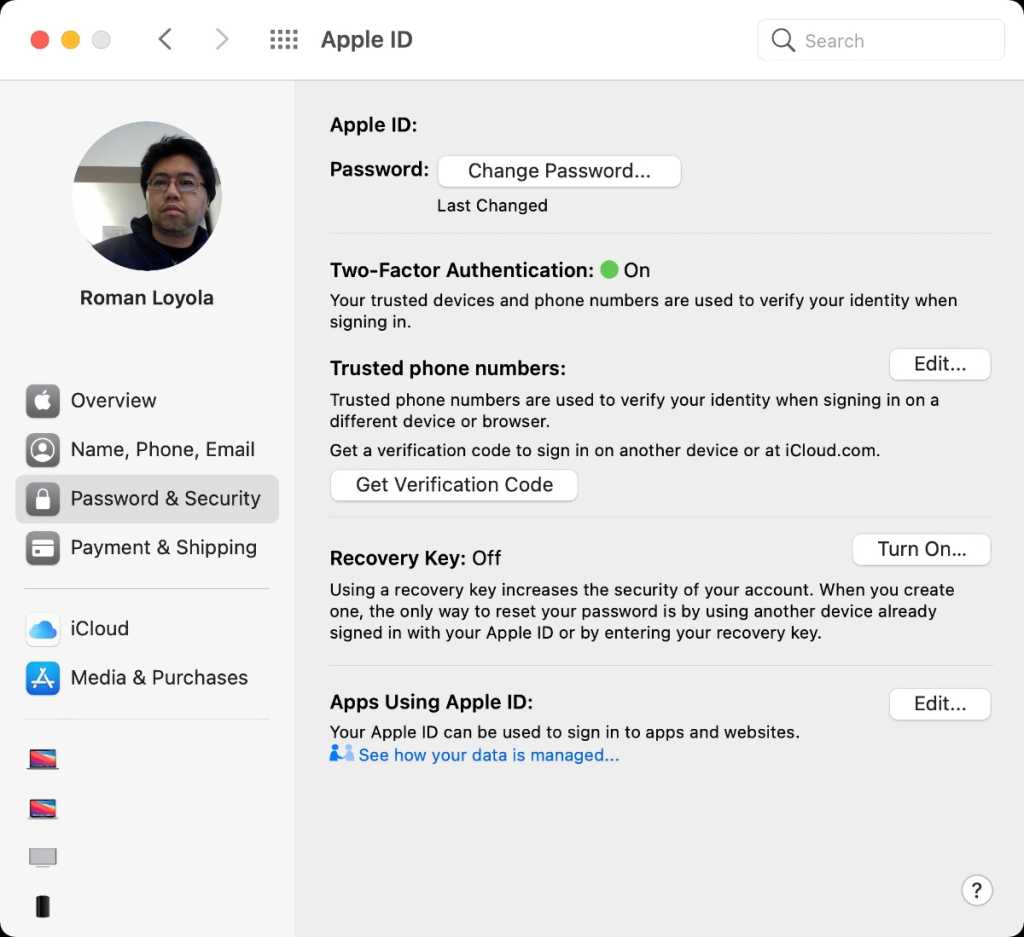
Setting this up on a Mac requires almost the same steps as on an iPhone or iPad. These instructions are for macOS Big Sur 11.3.1.
- Open System Preferences.
- Click on your profile at the top Apple ID.
- The Apple ID panel should open. In the left column, click on password and safety.
- find Two-factor authentication setting and turn it on.
- You may need to verify your identity by answering security questions.
- Enter a phone number that you can use to receive verification codes and choose whether you want to receive text messages or calls.
- Enter the code that was sent to you right now to complete.
IDG
If your Mac is running macOS Mojave or an earlier operating system, here are the instructions.
- Open System Preferences
- Choose iCloud. Press on Account details and sign in if prompted.
- On the Security tab, click the button labeled Turn on two-factor authentication. Read the message and click Continue.
- Verify your identity by answering security questions.
- Enter a phone number that you can use to receive verification codes and choose whether you want to receive text messages or calls.
- Enter the code that was sent to you right now to complete.
What should I do if my device is too old?
If your Mac is running an operating system earlier than El Capitan or your iOS device is not running iOS 9 or later, you can still use two-step verificationwhich is slightly different from two-factor authentication, mainly because it relies on a text message sent to a phone number, while the newer “authentication” is more seamlessly built into operating systems. Also, the old verification method requires you to save your recovery key in case you ever lose your password.
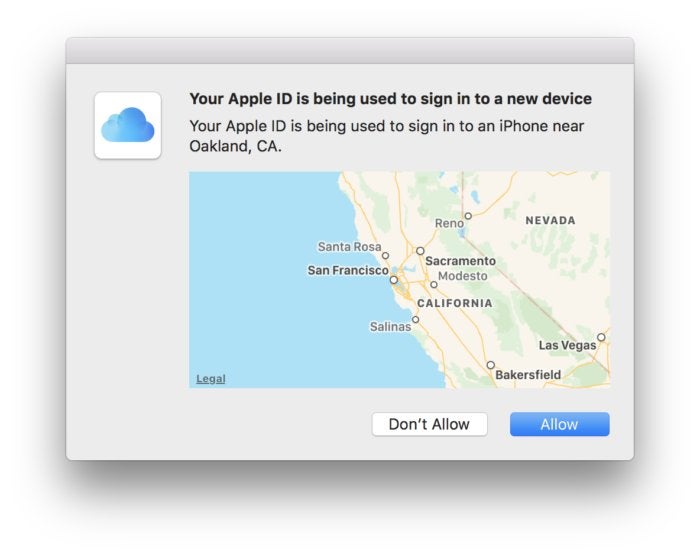
Two-step verification always sends you a text message. With the new two-factor authentication, you’ll get this cool popup on nearby trusted devices that are signed in to the same iCloud account.
You can learn more about Apple’s differences as well as our very own Glenn Fleischman.
Apple still provides a way to turn on two-step verification by following this link, signing in, and following the instructions.
[ad_2]
Source link