[ad_1]
It was decades ago when you could first pay for goods online with a credit card; followed by debit card payments. The security of such payments was often questionable in the early years of the commercial Internet. Database breaches of unprotected information made for easy mining. These days, a combination of factors has increased the security of online payments.
Firms offering online purchases of goods, services and subscriptions must comply with higher levels of compliance from banks and processors that allow them to accept electronic payments. Companies like Stripe and PayPal, among many others, receive card information or other payment information directly, so this personal and easily copied data is never stored or even visible on an e-commerce site. Apple Pay, Google Pay, and similar products use an encrypted element, so the “real” card number is never sent over the Internet, even if the entire transaction is encrypted from snoopers.
As a result, you may have multiple payment methods on your Mac via Safari. Apple has quietly made a change to one method that you may not have even noticed – I just recently discovered something very different in testing. Here are your general options and how to set them up.
Two important aspects of payment to be aware of in advance:
- Safari Autofill, described first, uses the credit card account number as it appears on your physical card (other than the Apple Card).
- Apple Pay, described below, generates an associated card number used for record keeping without revealing your actual account number.
Apple Pay is more secure and also prevents your card number from being stolen. It’s just not always available.
Saved card numbers in Safari
Apple has long allowed credit and debit card numbers to be stored in Safari. The exact method has changed over the years. In the last few releases of Safari for Mac, you manage these settings in Safari > Preferences/Preferences > Autocomplete clicking Edit to the right of Credit Cards. MacOS prompts you to authenticate in order to view and modify the saved information.
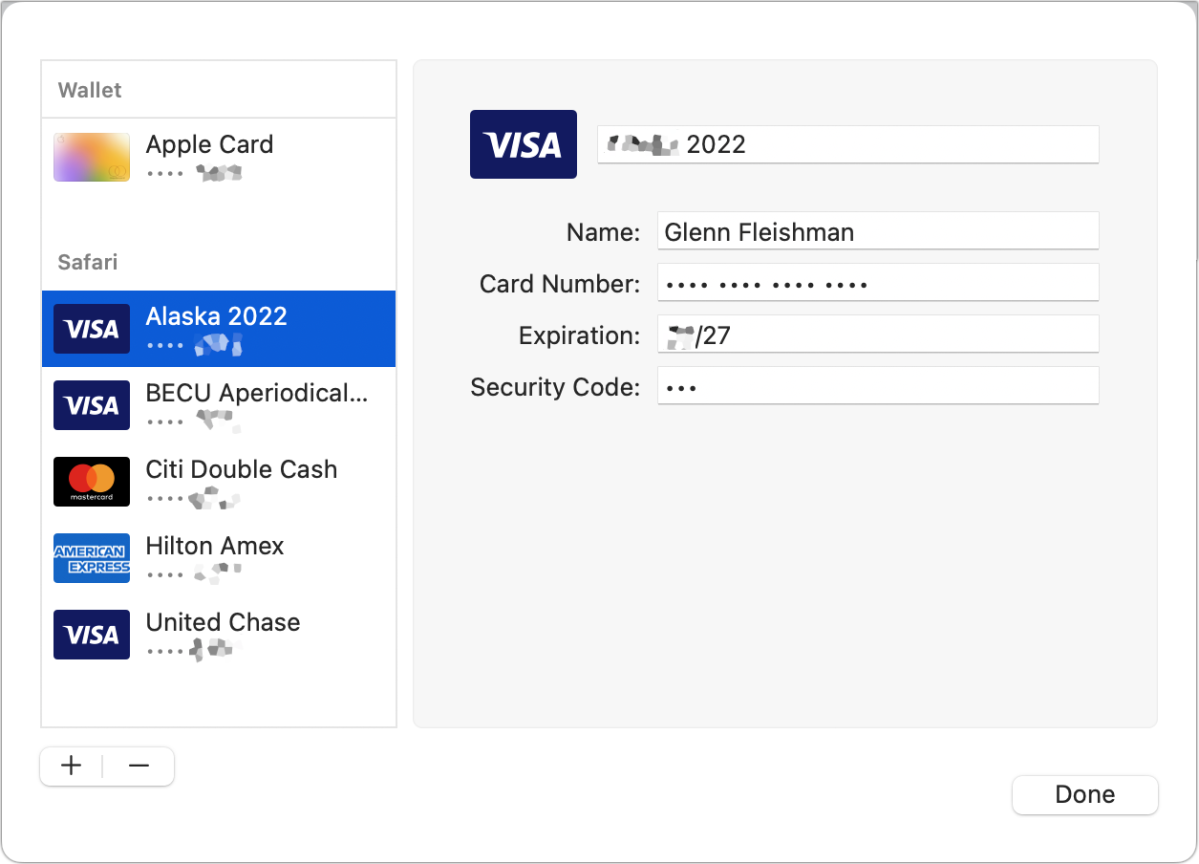
Here you can enter any information about the card, whether it’s available for use with Apple Pay or already saved in Apple Pay. You can enter card details manually, including a verification code, most commonly labeled CVV or CVC on cards that Apple added support for relatively recently. (See also “How to access credit card CVV from Safari via autocomplete”.)
While it may seem like it’s just text stored in your browser settings, that’s a thing of the past. At some point, Apple moved from easily protecting that card information stored in Safari to offering full encrypted storage and syncing on macOS keychain and iCloud keychain.
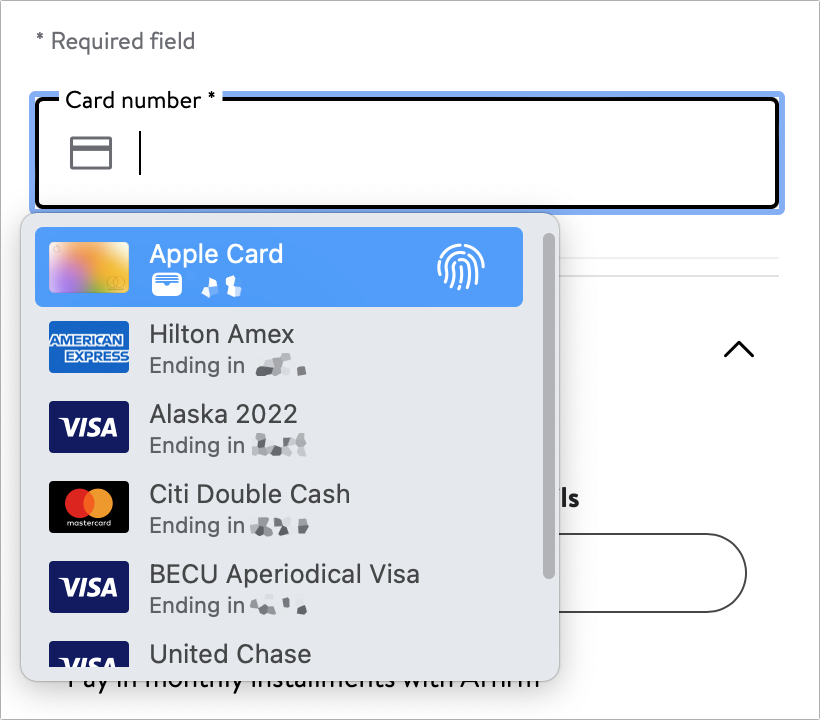
When you click on a form field that Safari recognizes as being associated with a credit card based on a series of prompts, you’ll see a pop-up menu with choices from Safari’s list of cards. If you have an Apple Card, it always shows up at the top. (You can hide this list if you uncheck the box next to “Credit Cards” in Safari’s Preferences/Autofill Preferences.)
Select a card to fill out the form. Safari enters data for any form fields it recognizes as accepting primary card data: name, number, expiration date, and verification code. If any item is missing after autofill completes, you should see a card-shaped icon in other fields that, when clicked, displays all the data as separate items for the card you selected, such as verification code and expiration date. Oddly enough, Apple only offers to authenticate filling out a credit card on a device with Touch ID — be it a laptop with Touch ID or an M-series Mac with a paired Magic Keyboard with Touch ID. Without Touch ID, the card information is simply filled in when selected.
Adding, deleting, or editing map entries in Safari’s autofill section syncs across all your devices with an active iCloud Keychain.
Apple Pay with your Mac
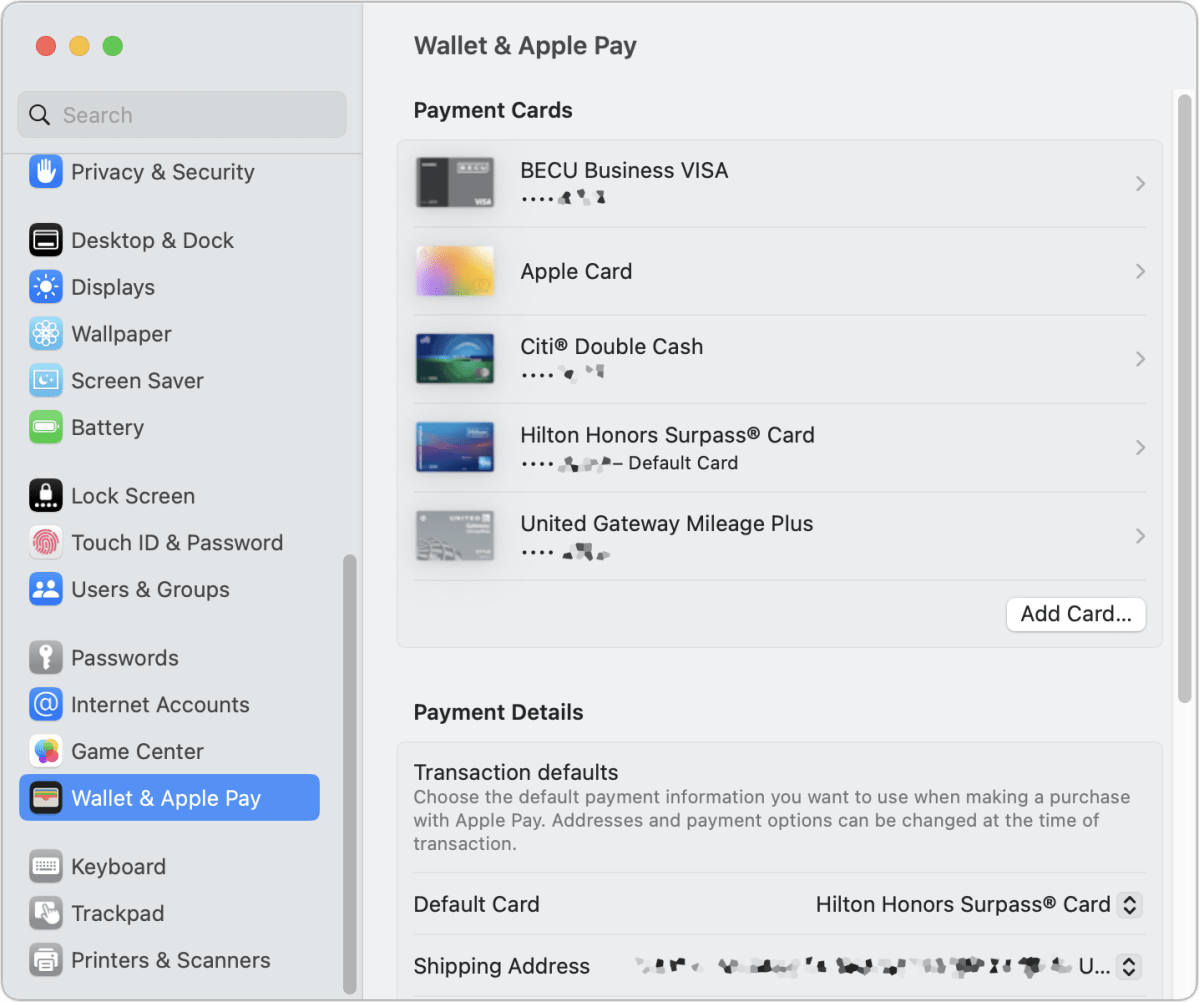
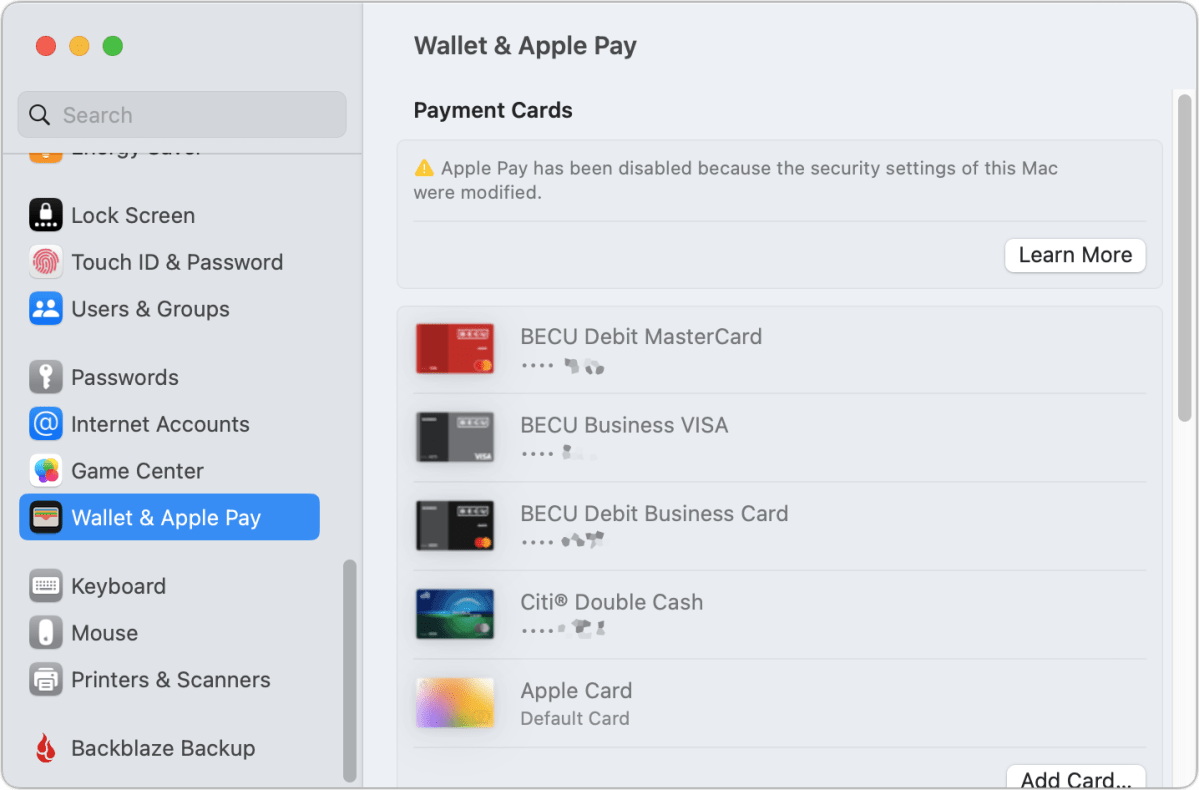
Apple supports Apple Pay directly in Safari on models with Touch ID or on M-series Macs with an active Magic Keyboard with Touch ID. You manage Apple Pay on Mac via > System Preferences/Settings > Wallet and Apple Pay.
Apple Pay entries in Wallet can be securely synced across all your devices via iCloud. Depending on the version of macOS you are using, go to System settings > iCloud, System settings > Apple ID > iCloudor System settings > account name > iCloud. In Ventura, you also need to click show all See Apps that use iCloud. You can then enable or disable wallet sync. Reason to keep him away? If you need specific cards for Apple Pay on individual devices and not the same set on all devices.
You can also turn on the Compatible Cards option in Wallet and Apple Pay to add any card that you’ve manually entered into Safari’s autofill that’s compatible with Apple Pay to Apple Pay. (Compatible means that the card issuer allows the use of an Apple Pay card.)
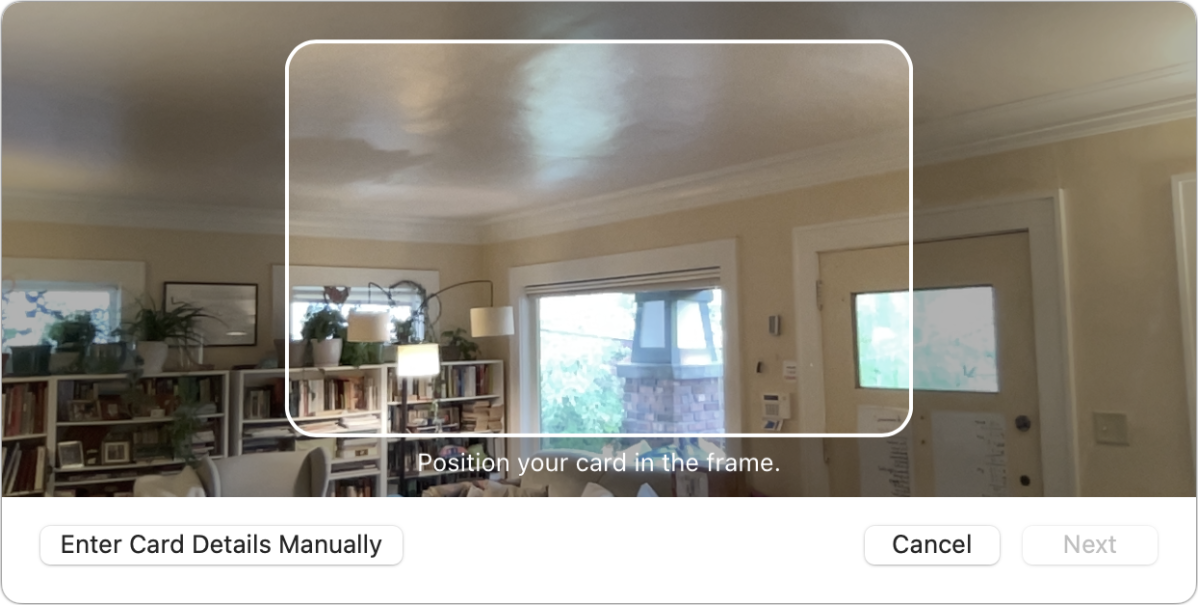
Apple allows you to add cards directly to Apple Pay through Wallet and Apple Pay. You can hold the card close to the camera if you have one built in or connected to your Mac, and macOS scans the card data just like it does with an iPhone or iPad. Clicking the Add Card button also displays all cards available through Safari Autofill or other devices if they aren’t listed as Apple Pay cards on your current Mac.
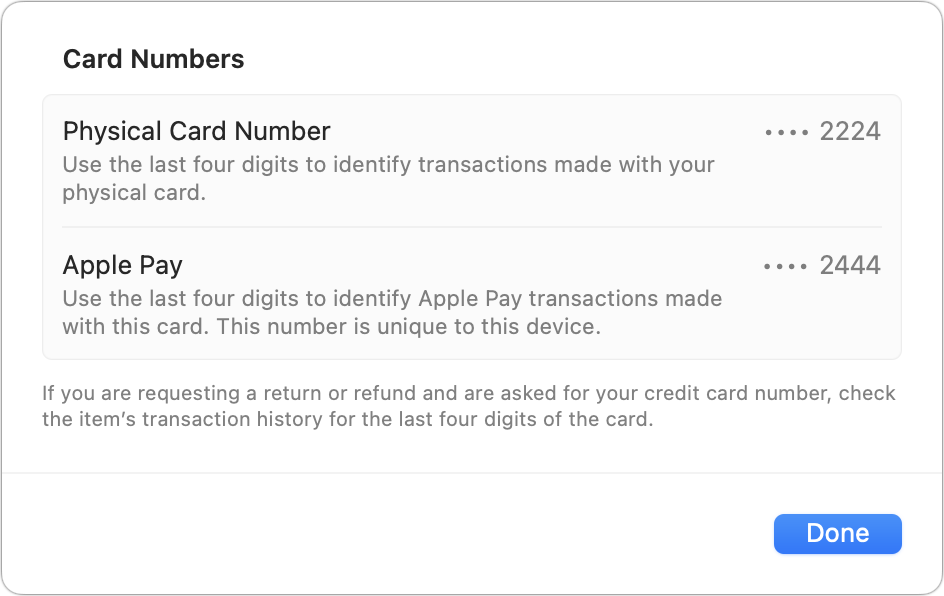
You can also click on a map entry to view details. Because Apple Pay generates a unique card number for transactions, protecting your account number from theft, Wallet and Apple Pay offer a “Show” button that shows the last four digits of your actual card number and the last four digits of the card number Apple uses. for transactions. This can be useful if you are asked to verify information by a website that wants you to enter these numbers for verification.
By clicking on the card, you can also access the Delete button to remove it from Apple Pay, but remember that deleting it with iCloud sync turned on will delete the card on all your devices.
Even with Touch ID enabled, you may find that Apple Pay is disabled. Apple offers many reasons, as I described in the article “Apple Pay not working on Touch ID Mac? Here are the security settings to check.” Normal – You had to lower the security level on your Mac in order to use a third party kernel extension.
Apple Pay in Safari
If you don’t have Touch ID for your Mac, or if it’s disabled for security or other reasons as noted just above, you can still pay securely using Apple Pay on your iPhone or Watch. Make sure in Safari > Preferences/Preferences > Privacy you checked the “Allow websites to check for Apple Pay and Apple Card” box.
This checkbox allows Safari to choose the best method available:
- First, if your Mac can use Apple Pay directly, you’ll be prompted to verify Touch ID when you choose to pay with Apple Pay.
- Then he looks for a watch. If you have it, you’re wearing it, and it’s unlocked, the Apple Pay dialog box will ask you to confirm on your watch, which beeps or vibrates. Double-click the side button on your watch.
- Finally, macOS looks for an iPhone registered to the same Apple ID account. (An iPad won’t work, although you can use Apple Pay directly from an iPad.) If you have an iPhone nearby, Apple Pay will prompt you to use it to confirm your order using any authentication method supported by your phone.
This Mac 911 article is in response to a question from a Macworld reader.
Ask Mac 911
We’ve compiled a list of the questions we get asked most frequently, along with answers and column links: read our super FAQ to see if your question is covered. If not, we are always looking for new problems to solve! Send your email to mac911@macworld.com, including screenshots if applicable, and indicate if you would like your full name to be used. Not every question will be answered, we do not answer emails, and cannot provide direct troubleshooting advice.